Series React Native and BLE: Part 2 - Building BLE framework for Android
When it comes to mobile technology, iOS and Android are the two dominant operating systems that power the majority of smartphones and tablets worldwide. As developers, it is essential that we have the knowledge and tools to work with both platforms effectively. This is especially true when it comes to utilizing Bluetooth technology, which is a crucial component of many modern mobile applications.
In part 1 of this tutorial series, we created a BLE (Bluetooth Low Energy) framework that could be connected to the UI using React Native. However, this framework only worked on iOS, which meant that we needed to develop a separate solution for Android.
In part 2 of this tutorial series, we will be focusing on defining a new SDK for Android and linking it to the UI, just as we did on iOS. This will allow us to fully support both operating systems and provide a seamless Bluetooth experience for all users, regardless of their device of choice.
Create new Android SDK
The very first step is to create your own Bluetooth library. Normally, engineers tend to use an open-source library such as RxAndroidBle or Android-BLE-Library powered by Nordic. However, the main goal of this tutorial is to guide you on how to create a new Android module and link it to React Native. This not only applies to Bluetooth but also to any library that you need to use in your app. The other goal is to gain foundational knowledge of Android BLE in case you need to modify something or create your own feature that has not been supported in the market.
By creating your own Bluetooth library, you have the freedom to customize and tailor the library to your specific needs. This can provide significant advantages over using pre-existing libraries, as you can optimize the library for your particular use case and avoid potential compatibility issues.
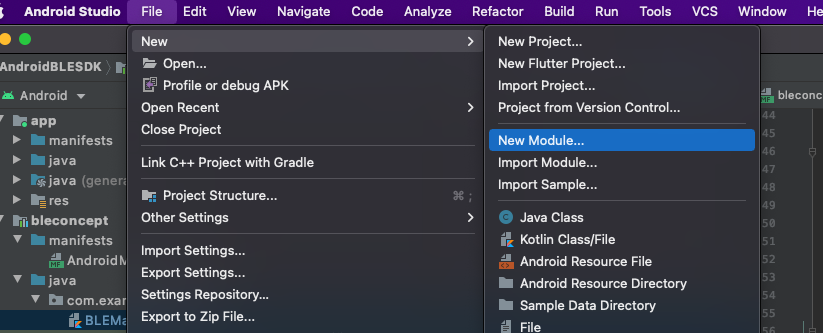
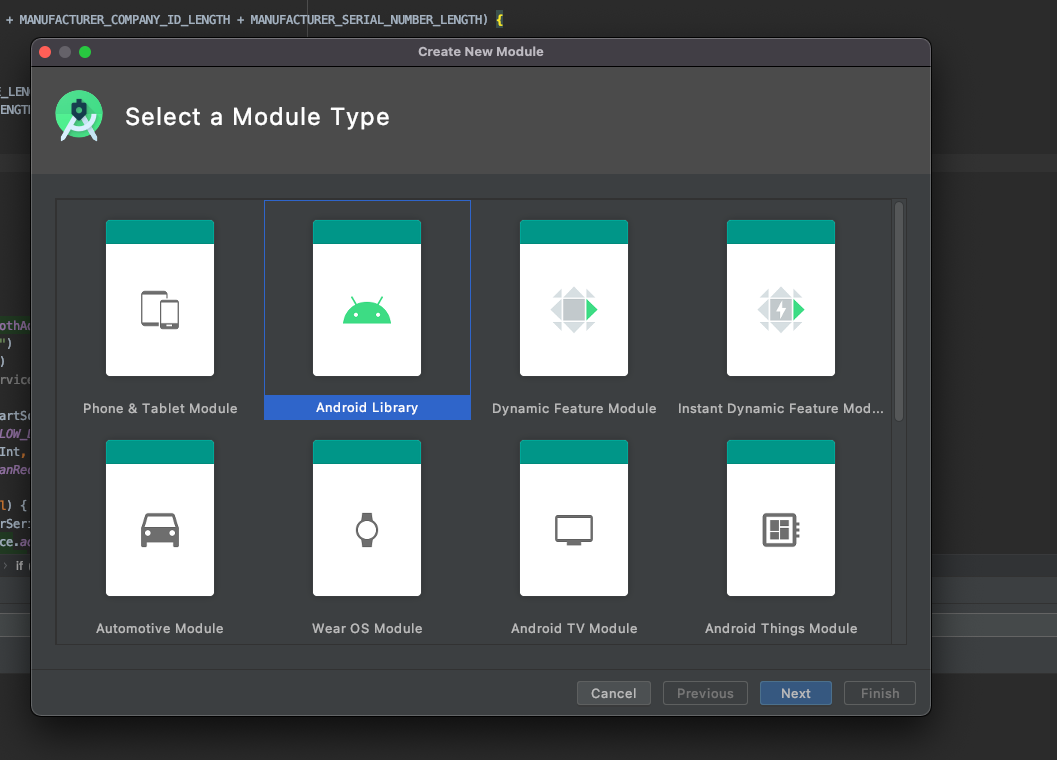
From your project, go to File > New > New Module > Fill in the information.
A new library will be added to your project.
One major different thing from Android and iOS is that from Android 6.0, Google requires the Location Permission to be enabled for Bluetooth Low Energy Scanning (See more Android 6.0 Changes).
Next, add the following permissions to your AndroidManifest.xml at android/app/src/main/AndroidManifest.xml
1 | <uses-permission android:name="android.permission.BLUETOOTH" /> |
1 | Android 12 update: |
For demo purposes, the SDK exposes only 2 simple APIs startScan to start scanning nearby devices and isBluetoothOn to check if the Bluetooth is turned on.
1 | /* |
1 | /* |
To request permission on React Native, we’re going to use this module https://github.com/zoontek/react-native-permissions to get the permissions the app needs.
Build and release Android SDK module
Next, let’s distribute the module so that other applications can use it.
From the root folder, run ./gradlew kTrackingSDK:assembleRelease to generate an .aar file.
The output file will be located at ./KTrackingSDK/build/outputs/aar, then you can import the .aar file to the android project.
Connect to React Native part
Now, we’ve already had the Bluetooth lib. The next step is to link the module to the React Native part.
Firstly, React Native part needs to understand the Native module. Add the following config to your /src/main/java
1 | class BLEManager(context: ReactApplicationContext) : ReactContextBaseJavaModule(context) { |
Creating new file to define the BLEManagerPackage
1 | class BLEManagerPackage: ReactPackage { |
Next, add it to the package list in MainApplication.java
1 | public class MainApplication extends Application implements ReactApplication { |
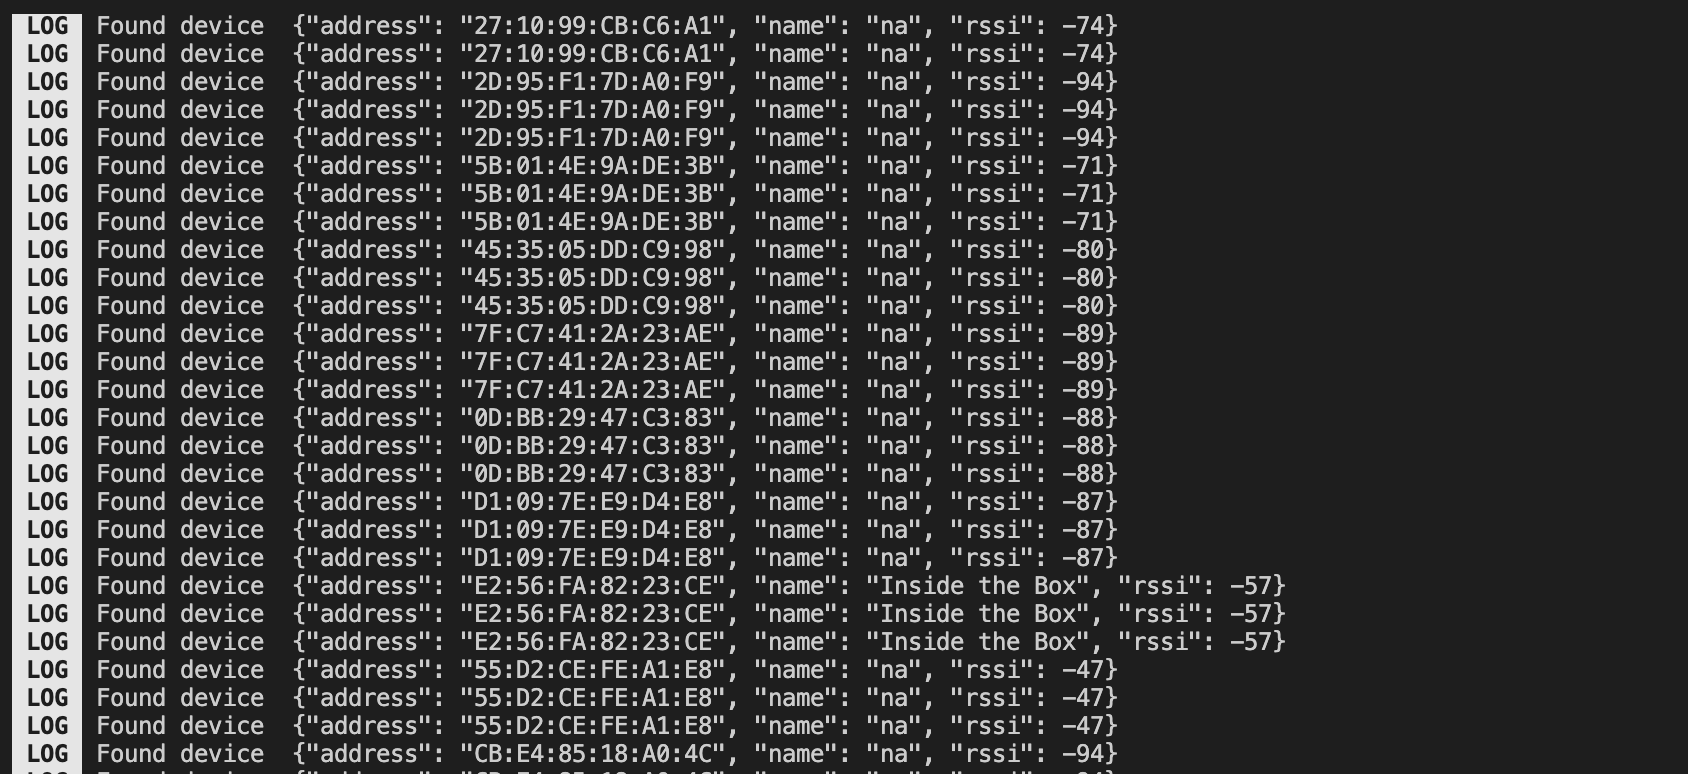
Result
Since we use the same code for both Android and iOS in the React Native part, there is no need to modify the React Native code from the previous tutorial. As long as you follow to the protocol we defined, everything should function as intended.
By maintaining a consistent protocol across both platforms, we can ensure that the code is easily portable and that any changes made to one platform will not affect the other. This can significantly streamline the development process and reduce the risk of errors or compatibility issues.
Conclusion
After spending countless hours researching and experimenting, we have finally learned how to create our own Bluetooth library and use it in our React Native project. With this newfound knowledge, the process of adding new features has become significantly easier and more efficient. We only need to implement the logic in Native Code instead of having to develop the UI part twice.
This has not only saved us a tremendous amount of time and effort but also allowed us to focus more on enhancing the functionality of our app. We can now dedicate more resources to developing new features, optimizing existing ones, and improving the overall user experience.
Moreover, our newfound ability to create custom libraries has opened up a whole new world of possibilities for our development team. We can now leverage our knowledge of React Native to create even more advanced and innovative features, all while maintaining a streamlined development process.
Happy coding!