Series React Native and BLE: Part 1 - Building BLE framework for iOS
I have been working in mobile development on both native projects and cross platforms (React Native, Flutter), and I also have experience working on BLE. Sometimes I get emails asking about the communication of RN/Flutter to BLE. Thus, I decided to introduce this series React Native and BLE to guide you on how to develop a native BLE framework and connect it to React Native.
Of course, there will be another series for Flutter and BLE after finishing the series of React Native.
In this series, I will guide you through a completed process from development to distribution.
- Create an iOS / Android framework.
- Script to build and distribute your framework.
- Import the frameworks to your React Native project.
- Use your native framework in React Native.
- Distribute your app.
- And other cool stuff I want to share with you …
If you love what I do, consider supporting me at buy a coffee for Uy Nguyen :)
Let’s go.
Xcode 13, iOS 15, Swift 5, React 17.0.1, React Native 0.64.1.
Prepare iOS framework
The first step is creating a BLE framework. You also don’t have to create a framework, you can include your source code inside the iOS project directly if you want to.
However, the reason why I recommend moving all BLE logic to a framework is that it’s reusable, you can share your framework to other projects such as Flutter or Native projects without having to duplicate the logic.
Another reason is that it will improve the compile time of Xcode, breaking your app into several frameworks can speed up the build times. This is because the Xcode build system doesn’t have to recompile frameworks for which Swift files have not changed.
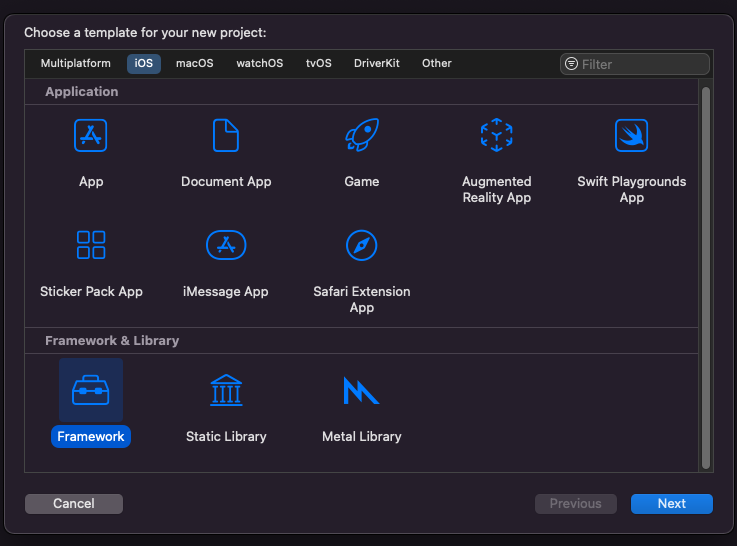
From the top left bar of Xcode, select File > New > Project > From the "Framework & Library" section, select "Framework" > Enter your framework name (I use "BLEFramework")
Now, you can develop your BLE logic in the project you just created. I’m not going to detail implementing all single methods of the framework as it depends on your business logic and your architecture. You can find my previous tutorials to have an idea of how to implement a BLE framework. Bluetooth Low Energy OniOS, Play Central And Peripheral Roles With CoreBluetooth
I will take a simple method in my BLE framework as an example: the startScanning method.
1 | /** |
OK now we have a BLE framework, let move to the next step: Building and distributing your framework.
Building and distributing
There are many ways to distribute a framework like using CocoaPod, or manually by sending a complied file, etc. In this post, I will provide you with a script to turn your framework into a universal framework that hides all your logic, and can be used for both physical devices and simulators.
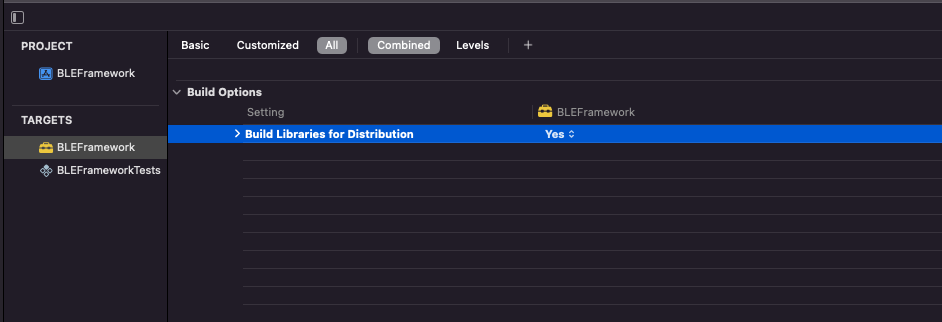
Make sure you turn “Build Libraries for Distribution” flag in the “Build Settings” to YES. The flag indicates that the compiler should generate one of the stable interfaces so the framework can be used when newer versions of Xcode or the Swift compiler are released.
Next, create a bash file, put it in the root of the ios folder, and copy the following commands to the file. Then execute the script.
1 | ### SCRIPT TO BUILD A SWIFT UNIVERSAL FRAMEWORK |
Once you run the script successfully, you should see the result as below
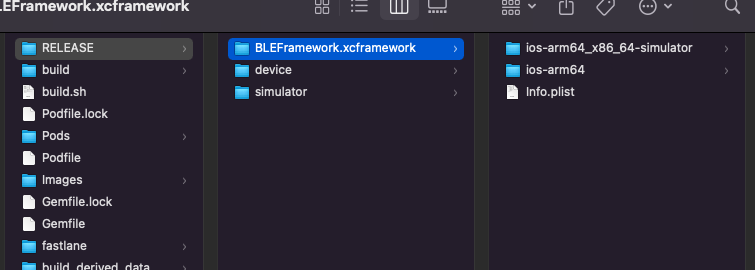
In which:
YOUR_TARGET_NAME.xcframework: The universal framework can be used for both physical devices and simulators.- device folder: contains
YOUR_TARGET_NAME.frameworkwhich can be used only on physical devices. - simulator folder: contains
YOUR_TARGET_NAME.frameworkwhich can be used only on simulators.
Now we have a BLE framework for our application, let’s move to the next step - Create a new React Native project.
Init React Native project
To create a React Native project without using Expo (I recommend to not using Expo because we’re going to add a lot of Native code for Android and iOS to our project, for more details you can refer to what is the difference between expo and react native), open terminal and type
1 | react-native init projectName |
Wait a while to set up your project. After running successfully, you should see the folder structure as below:
1 | |---projectName |
Open the projectName.xcworkspace file, we will config the native code in the next step.
Wire them together
First, drag and drop the YOUR_TARGET_NAME.xcframework to your Xcode workspace.
As my SDK is built in Swift, I’m going to create a Swift class as a bridge so that we can communicate from the SDK to React Native.
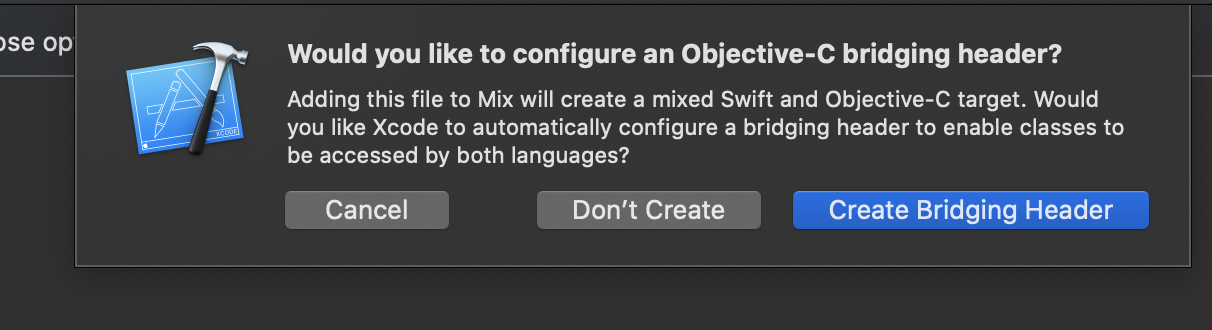
From Xcode project, select File > New > File > Swift File > Enter your file name (e.g BLEManager) > Add. A dialog will pop up to ask if you want to create a bridging header, select yes.
For those who don’t know what the bridging header is used for, the bridging header is where you define all the Objective-C classes that are exposed to Swift.
To use RCT classes, make sure you #import all related headers to your ...-Bridging-Header.h. Otherwise, you will get complied errors.
1 | #import <React/RCTBridgeModule.h> |
Next, add the interface RCTEventEmitter to the class BLEManager we just created in the previous step.
1 | (BLEManager) <--- Remember to add this [1] |
[1] Make sure you decorate your class and functions by the @objc keyword to ensure the class and functions are exported properly to the Objective-C runtime.
[2] Once a peripheral is discovered, send an event to Javascript.
[3] Register supported the event from the native module.
Finally, to expose the methods of your native module, create a new file BLEManager.m and add the following code.
1 | @interface RCT_EXTERN_MODULE(BLEManager, RCTViewManager) |
That’s all. Javacsript now can invoke the startScanning function and listen to the didFoundDeviceEvent event.
Testing
It’s time to test our implementation, React Native provides NativeEventEmitter and NativeModules instances that allow you to work with native modules.
from the root folder, open App.js and import the necessary things.
1 | import { |
In componentDidMount method, add the following to it
1 | componentDidMount() { |
[1] Create a new NativeEventEmitter instance and listen to the didFoundDevice event [2]
[3] Because we do not support the Bluetooth state changes event yet, so we temporarily delay 3s before calling scanning just to make sure the Bluetooth is on. We will improve it later by supporting more events and methods.
OK, let’s build and run your project. If you see your console log print the results from the scanning process, congratulation, you make it right!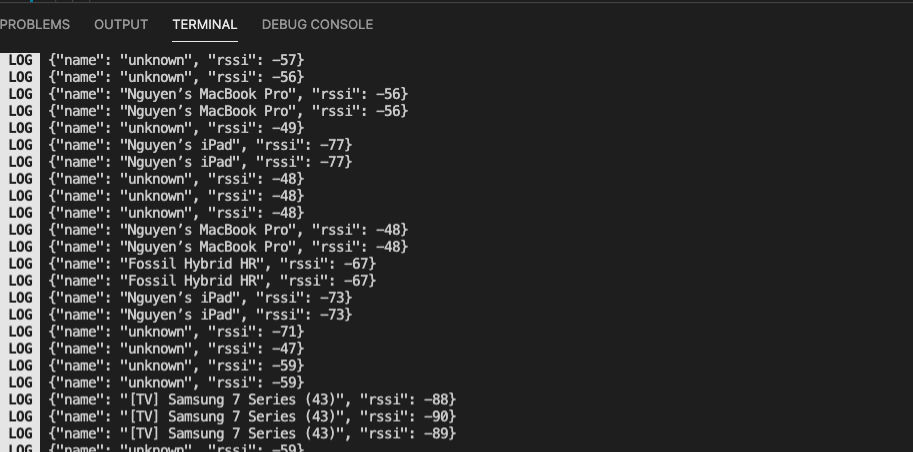
Next step
In this post, I showed you how to create a BLE framework and how to use a BLE native module in a React Native project such as invoking a method from Javascript to Swift and handling an event from Swift to Javascript. In the next tutorial, we will do the same on Android platform.
If you face any troubles, feel free to contact me. I would love to help.
Happy holiday.