Create and Distribute Private Libraries with Cocoapods
CocoaPods is a dependency manager for Swift and Objective-C projects. This tool not only allows us to easily integrate those dependencies but also allows us to create our own libraries. In this post I’m going to guide you how to create a private library and distribute it to your private team without publishing the library.
Init repositories
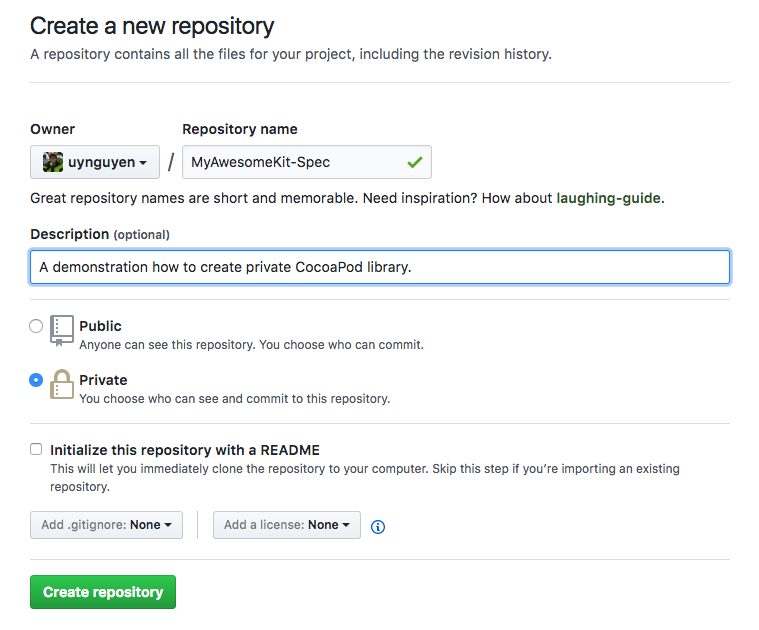
Go to Github or Bitbutket, then create two repositories. One for our source code that is shared between our team, the other one for Podspec, which defines all the information about that Pod.
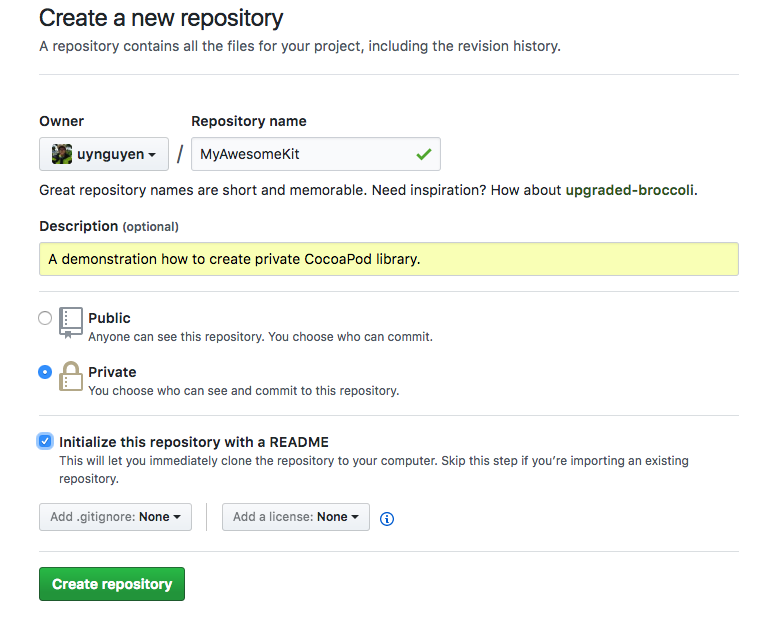
Following the instructions on Github page, it guides you how to add your project to these repositories.
1 | $ echo "# MyAwesomeKit-Spec" >> README.md |
Create our own library
Open XCode and create a new Cocoa Touch Framework named MyAwesomeKit. After that, create a simple class called HaHaHaManager, this class defines our public methods for clients. To make it easier, I define a simple method, which takes 2 numbers as arguments then return their addition:
1 | public class HaHaHaManager { |
Note: Since we are creating a public Framework, we have to overide the default constructor of the HaHaHaManager class, make it become public. Otherwise, our clients who use this Framework can not create an instance of this class because the default scope of classes in Swift is internal.
After then, push our code to the repository that we created at the first step. Make sure you add a tag as a version for this commit.
1 | $ git add . |
Add your Private Repository to your CocoaPods Installation
Use the following command to create your new private repository to your CocoaPods
1 | $ pod repo add REPO_NAME SOURCE_URL |
1 | $ pod repo add MyAwesomeKit https://github.com/uynguyen/MyAwesomeKit |
Make sure you have the correct access rights to the repository. You can config ssh to access the repo via ssh key. See also: Generating a new SSH key and adding it to the ssh-agent
To check if your installation is successful, use the following commands:
1 | $ cd ~/.cocoapods/repos/MyAwesomeKit |
This command is used to validate specifications. --allow-warnings flag indicates that we skip all warnings when validate the Pod file. (Missing some options such as lisence, author or description).
Generate our Podspec file
Type the command to generate our Podspec file. This file contains all information about our code, including git repository, the version of the library, dependencies, etc.
1 | $ pod spec create MyAwesomeKit |
You will see something like this
1 | Pod::Spec.new do |s| |
Here’s what’s going on:
- 1: Your other Podspecs depenencies. For more than one dependency, add new line to define it.
- 2: The source files that will be included. (Replace it by .m, .mm, .c or .cpp if you need)
- 3: The framewords that are linked with your library.
For other options, please refer to Podspec Syntax Reference
Push to Spec Repo
1 | $ pod repo push MyAwesomeKit MyAwesomeKit.podspec --allow-warnings |
The structure of your folder will be like
1 | . |
Whenever you update the library, you have to run the update command to update your Pod repos
1 | $ pod repo update |
Use our awesome Kit
It’s time to use our powerful Kit. Open XCode and create new project named MyAwesomeApp. After that, type the below command to init the Pod file
1 | $ Pod init |
Open the Pod file, add the following code to install our library.
1 | # Uncomment the next line to define a global platform for your project |
Let see our results (Pray and hope to it works well)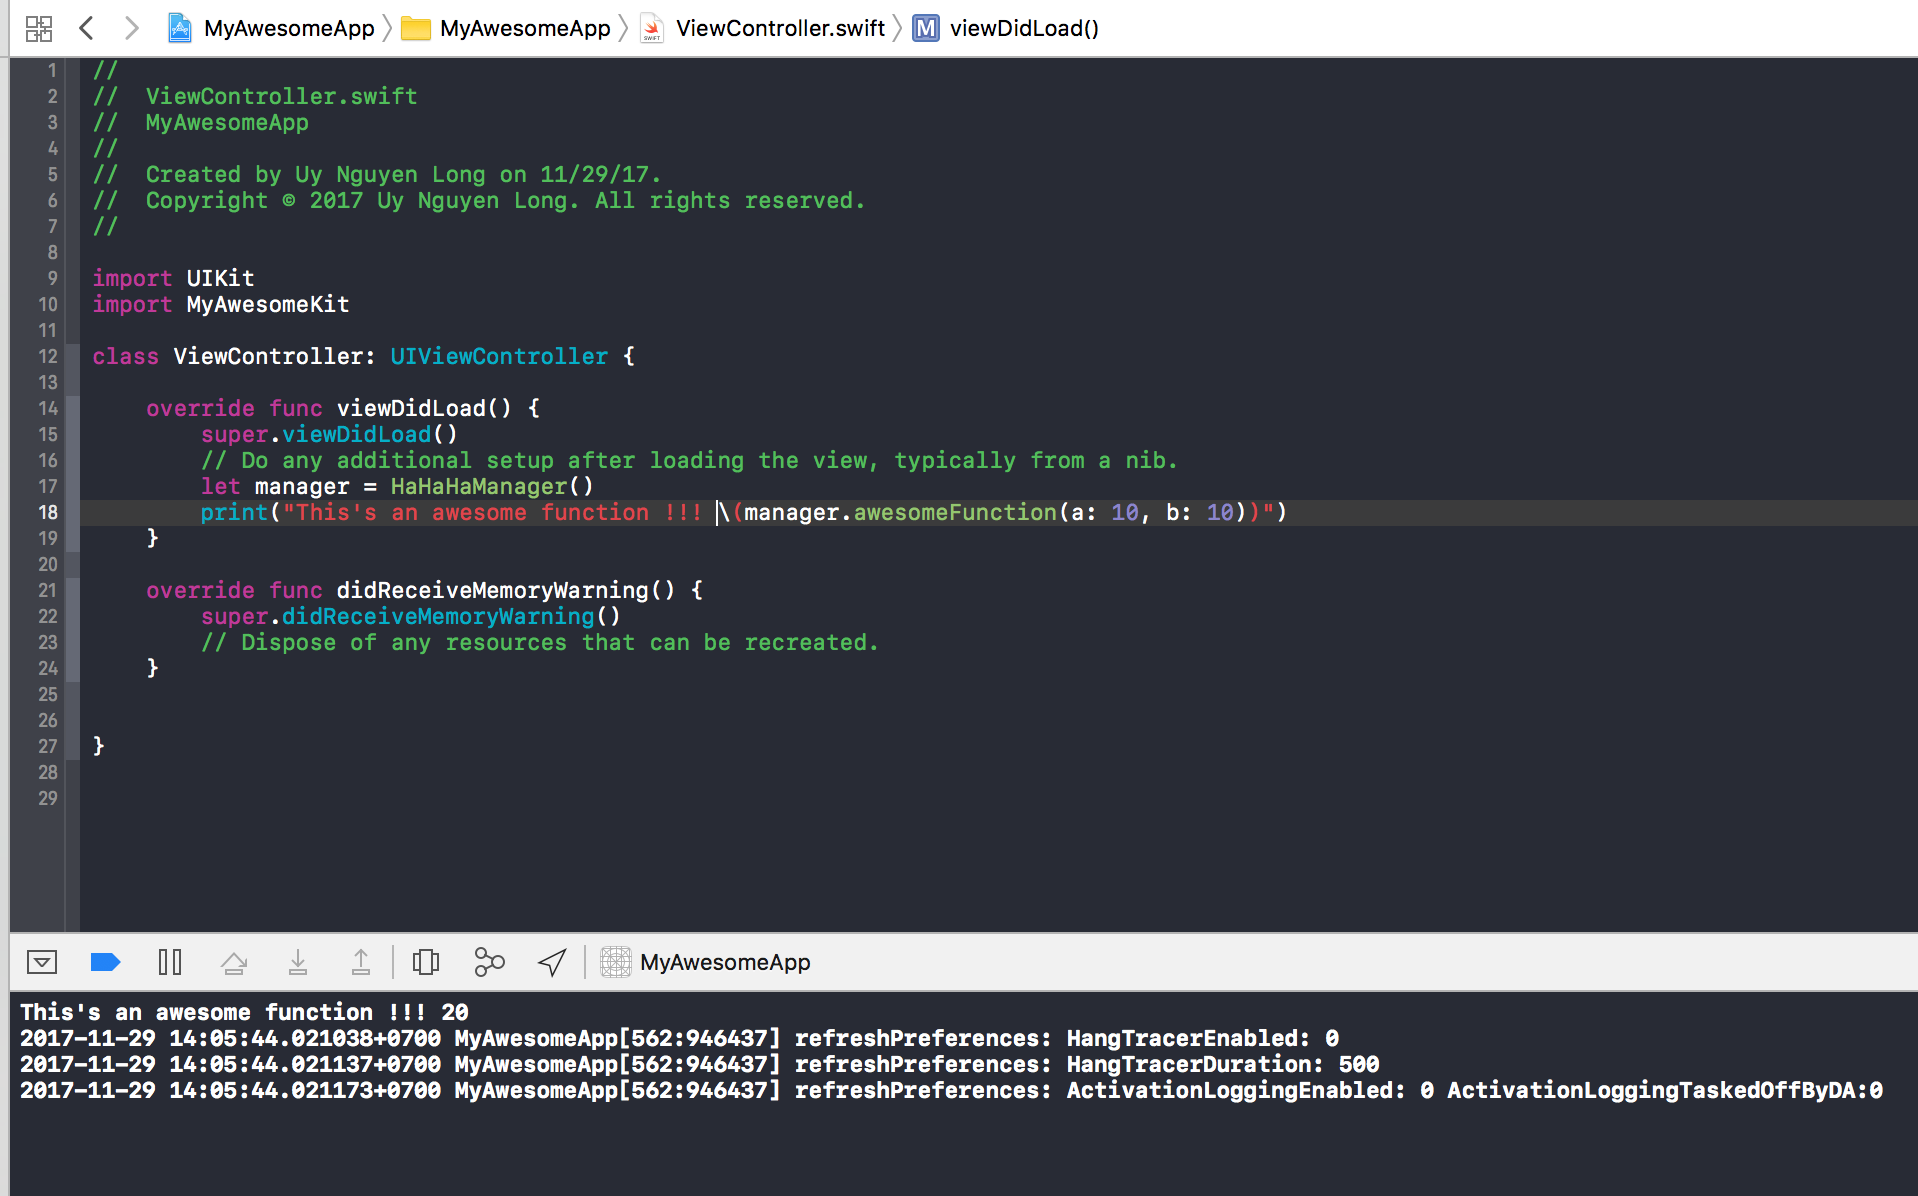
Conclusion
We have just published our first private Pod to our team. From now on, our team can use this library privately. Moreover, it’s easy to update and distribute the library when it gets upgrade. Thanks to CocoaPod!
If you have any questions or comments about the post, feel free to kick an email to me.
References
[1] Private Pods