Integrar Google Sign In en una App MacOS con Swift

Como desarrollador iOS, podrías tener la oportunidad de escribir aplicaciones en Mac OS. Y a veces, tus aplicaciones requieren que los usuarios se autentiquen antes de poder usar tu app. Habilitar Google Sign in te ayuda a ahorrar mucho tiempo para implementar el flujo de autenticación. Desafortunadamente, hay falta de documentación sobre cómo integrar Google Sign in en apps de MacOS, particularmente en Swift. Una vez tuve la oportunidad de implementar esta característica en mi app. Ahora quiero compartir contigo cómo podemos hacerlo. Comencemos.
Configuración
Primero creemos tu aplicación de Mac OS, nómbrala como quieras. Luego, ejecuta el comando pod init para inicializar el workspace de Pod.
Después, agrega la siguiente línea a tu archivo Pod.
1 | use_frameworks! |
Luego ejecuta pod install para descargar todas estas dependencias.
Obtener un OAuth client ID
Antes de comenzar con el ejemplo, primero ve a Google Console y crea un nuevo proyecto. Luego presiona “Create credentials” > “OAuth client ID” > tipo de aplicación “Other” > Sigue las instrucciones para obtener tus credenciales.
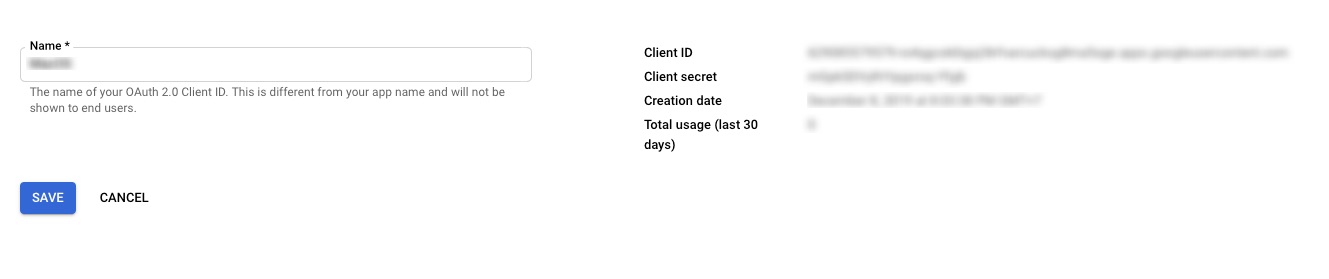
Después de crear el OAuth client ID, toma nota del client ID y el client secret, los cuales necesitarás para configurar Google Sign-in en tu app. Opcionalmente puedes descargar el archivo de configuración que contiene la información de tu proyecto para referencia futura.
Configurar el proyecto
Asegúrate de configurar tu app para permitir conexiones de red entrantes y salientes yendo a Signing & Capabilities > App Sandbox > Marca tanto Incoming Connections como Outgoing Connections. Si no haces eso, obtendrás el siguiente error porque tu app no tiene permiso para realizar solicitudes.
1 | 2019-12-11 22:22:49.472046+0700 GoogleSignInDemo[3955:65750] Metal API Validation Enabled |
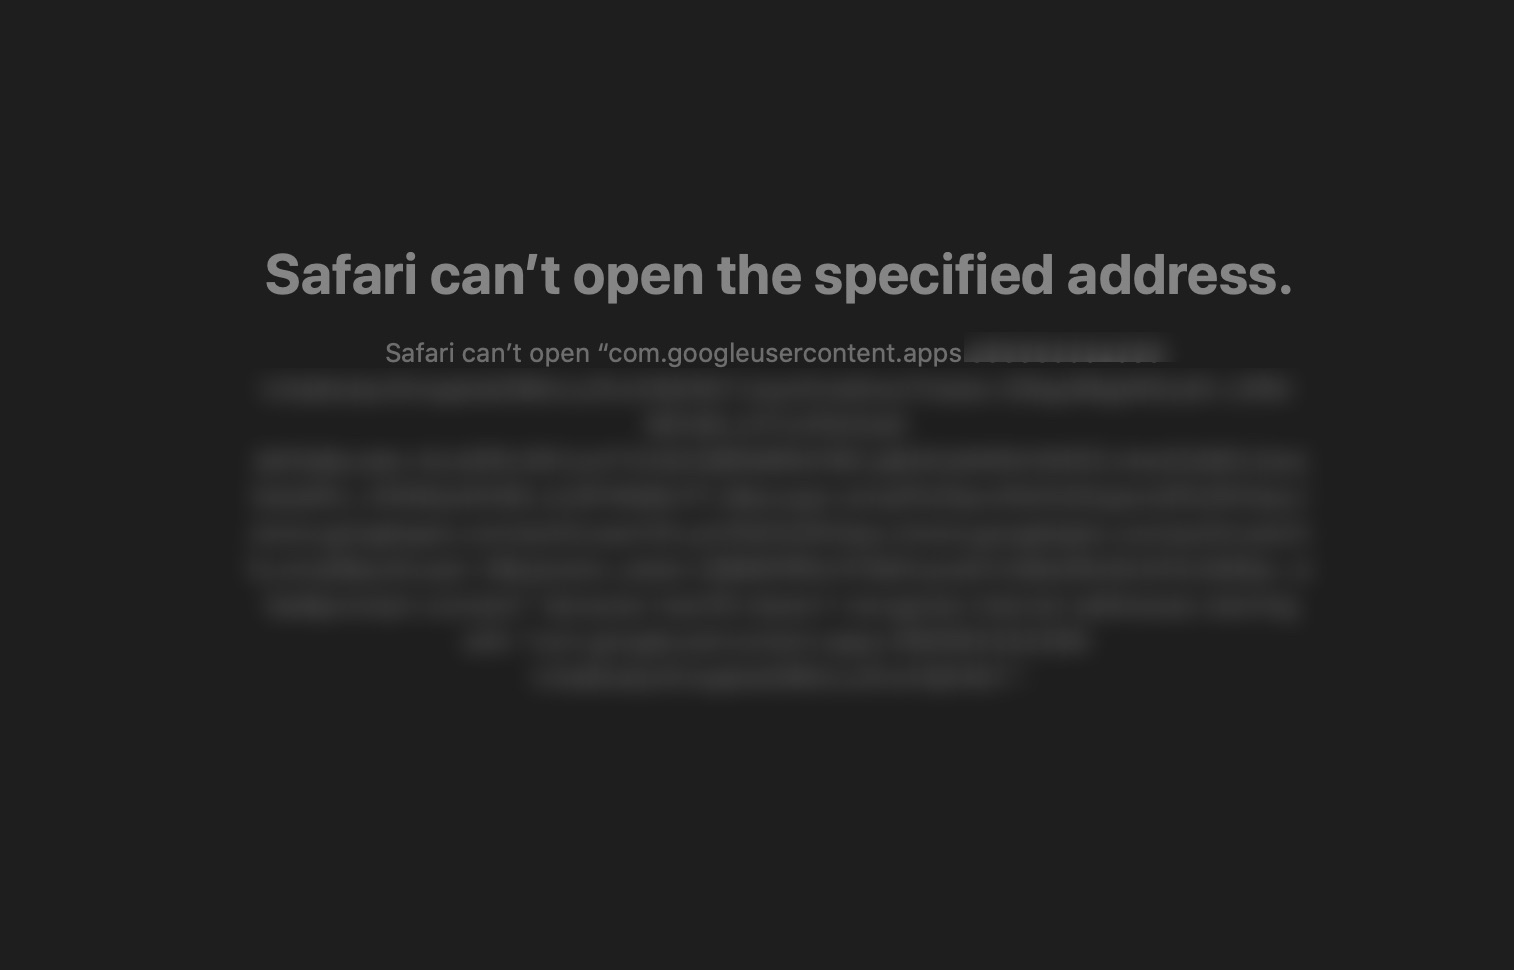
Después, abre el Info.plist y agrega un nuevo valor para CFBundleURLTypes, que es la forma de notación DNS inversa de tu client ID. Safari usará esta notación DNS para abrir tu app después de que el proceso de autenticación se realice exitosamente.
1 | <key>CFBundleURLTypes</key> |
Realizando la autorización
Primero creemos nuestro objeto de servicio, la clase GoogleSignInService, que maneja todas las solicitudes relacionadas con Google Sign in. También contiene todas las credenciales de tu proyecto.
1 | class GoogleSignInService: NSObject, OIDExternalUserAgent { |
Descubre el endpoint del servicio de Google y define una solicitud.
1 | OIDAuthorizationService.discoverConfiguration(forIssuer: URL(string: Self.kIssuer)!) { |
Mira el parámetro scopes, este parámetro define a qué información del usuario puede acceder tu app. Google Sign In ofrece 5 scopes diferentes, incluyendo:
- NSString *const OIDScopeOpenID = @”openid”;
- NSString *const OIDScopeProfile = @”profile”;
- NSString *const OIDScopeEmail = @”email”;
- NSString *const OIDScopeAddress = @”address”;
- NSString *const OIDScopePhone = @”phone”;
Puedes seleccionar cuáles se ajustan a los requisitos de tu app.
Finalmente, inicia el proceso de autenticación.
1 | OIDAuthState.authState(byPresenting: request, externalUserAgent: self, callback: { (state, error) in |
Después de que el proceso de autenticación se realiza exitosamente, obtendrás un objeto OIDAuthState que se usará como parámetro para inicializar el objeto GTMAppAuthFetcherAuthorization.
Normalmente, deberías guardar este objeto GTMAppAuthFetcherAuthorization en un keychain y reutilizarlo para las siguientes llamadas a la API REST.
1 | private func saveState() { |
Realizando solicitudes
Después de guardar el objeto de servicio en el keychain, ahora puedes recuperarlo para hacer cualquier solicitud. Haré una solicitud para obtener el perfil del usuario actual.
1 | func loadProfile() -> Promise<GoogleSignInProfile> { |
Solución de problemas
- Después de iniciar sesión, si tu Safari no puede redirigir de vuelta a tu app. Solo limpia tu proyecto (Shift + Cmd + K) y luego ejecútalo de nuevo.
- Otros navegadores web (Chrome, Firefox, etc) no pueden abrir tu app así que asegúrate de lanzar la web de inicio de sesión en Safari.
1
NSWorkspace.shared.open([url], withAppBundleIdentifier: "com.apple.Safari", options: .default, additionalEventParamDescriptor: nil, launchIdentifiers: nil) {
Reflexiones finales
Puedes encontrar la demostración completa aquí
Ahora puedes usar Google Sign in dentro de tu macOS para reducir tus esfuerzos en la autenticación. Para obtener el código fuente completo, por favor descárgalo a través del enlace de Github.
En caso de que tengas algún problema, no dudes en contactarme.